Instagram Twitter

Halo Halo | Bullet Journal, Blog Post Ideas and More

    • Home
    • About
    • Hire Me


    On a previous post, we talked about 3 reasons why you should start a bullet journal and to summarize it I talked about how bullet journal can help you prioritize, be organize and essentially be creative. I have discussed about it more thoroughly on said post. More so, I have given out tips on starting a bullet journal for beginners and there I talked about materials and the "basic" spreads you will need for your bullet journal. 

    These essential spreads are your key & index, future log, monthly spread, weekly or daily spread and your collections; however, apart from these "basic" spreads there are others that you can do as well depending on what you need. 

    Here is a list of spread ideas that you can easily do in a minimalist way or in a creative way, some of which are pretty common already for a lot of people. 


    23 Bullet Journal Spread Ideas


    1. Mood Tracker


    2. Brain Dump


    3. Washi Tape Collections


    4. Instagram Tracker 


    5. YouTube Growth Tracker


    6. Blog Growth Tracker


    7. Goals Tracker


    8. Bucket List


    9. Expense Tracker


    10. Gratitude List


    11. Habit Tracker


    12. Period Tracker


    13. Sleep Log


    14. Self-Care


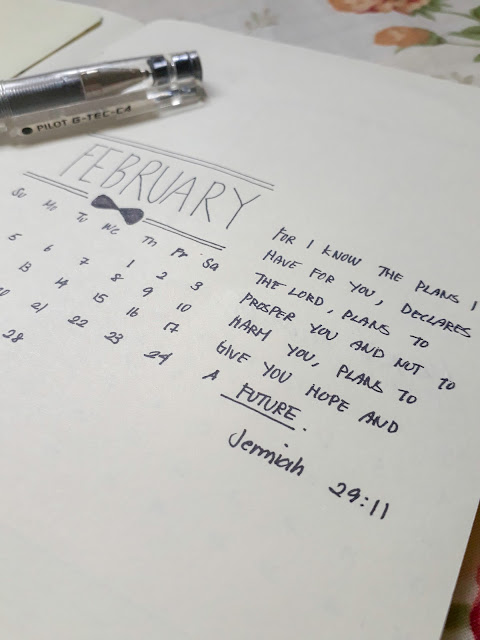
    15. Quote of the Month Spread
    "A little progress each day adds up to big results"


    16. Important Contacts


    17. Books to Read


    18. Movies to Watch


    19. Guest Post Tracker 


    20. Page Views Tracker (Articles)


    21. Fitness Tracker


    22. Paint Swatches


    23. Favorite Quotes


    Now that you have an idea in mind on what spread you want to do and try on your bullet journal, you can click on the video I have posted above to see an average minimalist bullet journal set up made by yours truly to get an idea of what style or theme you want to do on your own.

    For this month's spread, July, I decided to go with a mango theme for my bullet journal with a hint of a minimalist and practical approach because I don't want to go overboard with it and be overwhelmed every time I try to write on it.

    All of these photos are mine and I am trying out some of these spreads to see if it is compatible with my lifestyle and so can you. 

    What's your favorite spread?


    Continue Reading


    Back in 2007 Ryder Carroll introduced the idea of bullet journaling to his colleague who was planning a wedding, and on August 2013 he launched his site together with a tutorial video. He sees this as an evolving, adaptable practice meant to be self-curated as you determine what works best for you (“Bullet Journal”, n.d.).

    Each bullet journal is unique to its owner, having different purposes for the owner’s personal needs. You can put a lot of different spread sheets such as a habit tracker, mood tracker, YouTube or blog growth tracker and many more depending on what you need.

    I talked about the reasons why you should start a bullet journal a few posts back, and it pleases me to see that I got a lot of positive feedbacks from it. Assuming that I or your friends and family was able to convince you to start a bullet journal of your own, I created this post to help you out on starting your journey. So here is the Ultimate Beginners Guide to Starting a Bullet Journal.


    The Ultimate Beginners Guide to Starting a Bullet Journal


    Basic Materials


    What You’ll Need:
    •          Bullet Journal Notebook
    •          Highlighters
    •          Colored Markers
    •          Ruler
    •          Your favorite black tinted pen


    For your bullet journal notebook, I recommend getting either one of these three sheet styles: blank, dotted grid or graphing paper. I am recommending these sheet styles because they do not limit you on how you organize your thoughts.

    Lined notebooks are great for people who use their notebooks strictly for writing (“Paper Notebooks Explained”, 2017). There’s nothing wrong with using that as your bullet journal but having no restrictions and limits where you can doodle unobtrusively with blank, dotted grid or graphing paper will give you the best experience in bullet journaling.


    For the pen you can use your favorite one, but I personally love the look and feel of using the Artline Drawing System in 0.2mm line width for drawing and writing on my bullet journal. This is a water based and water resistant black pigmented ink used for drawing, graphic design, illustrations and documents. The pen is available from 0.1mm to 0.8mm of line width so you have a variety of choices to choose from.


    Highlighters and colored markers are essentials because they add life to your bullet journal. My favorite highlighters are the pastel color ones from Stabilo and I use colored markers from Faber-Castell. Color plays a major role in setting up our mood, emotions, feelings and state of mind. Which is why it is important for you to choose colors that makes you feel good inside.

    Bright colors such as the color yellow encourages us to be happy and optimistic and the use of dull colors suggests being moody and emotionless. But the use of color still depends on the theme you are going with and your aesthetics so who am I to stop you. You do you!


     The “Basic” Spreads

    •          Key and Index
    •          Future log
    •          Monthly Spread
    •          Weekly Spread
    •          Collections


    1       1. Key and Index

    The index will serve as a guide for you in the future to be able to see what goes where in your bullet journal and the keys will tell you on how to mark various things such as completed tasks, events, birthdays, important tasks and many more depending on what you need.

    The design of your keys depends on how you want it to look like, if you are at lost you can find inspirations from Pinterest and Instagram.


    2      2. Future log
    The future log is a simple and easy place to flip to when you need to check when a specific event is happening (Carroll, n.d.). It doesn’t necessarily need to be fancy or creative you just need to establish and find a way to fit all 12 months into two pages while considering if there is enough space for you to write on.  


    3       3. Monthly Spread
    The monthly spread is an overview of the whole month. I know you see a lot of fun and creative monthly overview layout from YouTubers like amandarachlee and jennyjournals but yours doesn’t need to be that way. If you like a more practical and minimalist style you can do that. Your bullet journal is your safe haven, you can do whatever you want with it and nobody is going to judge you.


    4       4. Weekly Spread

    Weekly spread is an overview of the week. It is all about preference at this point but personally, I prefer to have a weekly spread as oppose to having daily spreads because that way I can have an overview of the task, appointments and events with just one glance; additionally, daily spreads are not really my thing.

    But like I said it is all about preference at this point and if you prefer to have daily spreads instead of weekly or if you prefer to have both of them then by all means go for it. No one can dictate you what to do with your bullet journal not even me! I wish I could insert a winky face right here but that would be too unprofessional.


    5       5. Collections
    Collection Modules or Collections are great for organizing specific lists (shopping lists, reading lists etc), classes and projects (Carroll, n.d.). Basically, a collection is just a one big to-do list for the whole month or year even. I have a collection spread on each month that goes by and so far, it works well for me.


    Apart from these “Basic” Spreads there are others that you can do as well such as,

    •          YouTube and/or Blog Growth Tracker
    •          Gratitude Log
    •          Time Log
    •          Habit Tracker
    •          Mood Tracker
    •          Bucket List
    •          Goals Tracker
    •          Budget Tracker
    •          “I am Thankful for…” List
    •          Important Contacts


    There are a lot more spreads that you can create that works best for you and your lifestyle. Just like what I have mentioned earlier in this post, Bullet Journaling is an evolving, adaptable practice meant to be self-curated as you determine what works best for you (“Bullet Journal”, n.d.).

    I hope I was able to help you with this Ultimate Beginners Guide to Starting a Bullet Journal and if you aren’t already convince that bullet journaling may help you in becoming an organize person then you might want to check out 3 Reasons Why You Should Start a Bullet Journal.

    Happy Journaling!


    Continue Reading


    People read blogs to get information to solve a problem (Money Journal, 2016). Chances are you are reading this right now because you have ran into a case of writer's block. I have been there before more often than not actually and I have sought for ways to get out of that certain situation all over the internet. Among the many advice that I received from various social media platforms there were only three ways that really got me out of my writer's block.

    Sharing is good and with digital technology, sharing is easy (Stallman, n.d.). I decided to put those three effective useful tips in one post in hopes of being able to help you get out of your own writer's block so here are 3 ways to help you come up with new blog post ideas.


    1. Online Articles
    Through reading online articles you will be expose to new information and new things that not only could help you come up with your own blog post idea but it could expose you to new ways of solving a problem as well. Taking a chunk out of an already existing article and putting your own twist to it based on how you understand it is a good way to keep yourself generate [more] ideas that could essentially help you into making your best blog post yet. 

    I use the mobile application "Pocket" that allows me to save tons of articles to read offline on my spare time. A certain article from the mobile application has inspired me to write this very post that you are reading right now so reading articles online could definitely help you come up with blog post ideas.


    2. Magazines
    Assuming that the magazines that you pick out are the ones that has something to do with your blog niche, this method allows you to come up with blog post ideas around that niche. Pick yourself a Cosmopolitan Magazine if your niche is beauty and fashion or a Wanderlust Travel Magazine if your niche is all about travelling. There are topics, tips and tricks in there that could give you an idea on what to write about on your next blog post. You could even do the same article but with your own twist to it to give it a new flavor.

    This is a favorite method of mine to do because we have a lot of magazines around the house. Even the magazines that were published many years back could help you come up with your own topics that are relevant in today's society.


    3. Pinterest
    Pinterest is where people discover new ideas and find inspiration to do the things they love ("All About Pinterest", n.d.). It covers a variety of categories from business to weddings, make-up to home decor and photography to travelling. There are a lot more categories worth mentioning but that is for you to find out!

    Pinterest is usually the place where I find inspirations for flatlay photography, tips and tricks on how to take good photos and all that good stuff. It is easy to navigate around Pinterest and find pictures that inspires you. It is available in both website form and as a mobile application so you could pretty much take it with you wherever you go.


    What is your favorite way to come up with blog post ideas?


    Follow my blog with Bloglovin
    Continue Reading


    Having a planner can be a good thing, it can help you keep track of daily tasks and appointment, helps you manage your time and helps you increase your productivity; however, sometimes the limited space and lack of pages that actually fits your needs can be a little bit of a downer. Although that may not be a bother to some people, it would still be nice to make the best of your planner but with a bullet journal you won't have to worry about wasting any pages.

    A Bullet Journal is a customizable and forgiving organization system (Bullet Journal, 2013). There are tons of things you can do with a bullet journal namely it can be your diary, mood tracker, sketchbook, to-do list and many more. It is versatile and can basically adapt to your needs. It doesn't necessarily need to conform to the usual bullet journaling that you see on YouTube and on Pinterest where the creators really got creative with each of their pages. You can just simply add the main components of a bullet journal without having to decorate your pages. These components are topics, short sentences and bullets.


    1. Prioritization 
    The best way to make things happen is to prioritize (MacDonald, 2018). A bullet journal can simply be your to-do list and when making said list we tend to jot the important tasks needed to be done first before the minor ones. 

    That being said you can also stick or draw yourself a monthly calendar in your bullet journal to keep track of appointments and what not. Whatever a planner can do your bullet journal can too. You can accomplish all the things you want by lining up your priorities with a schedule that works best for you (Breus, 2018).


    2. Creativity 
    If you're one of those people who likes to customize, design, doodle and color in your journal or notebooks then bullet journaling might just be the perfect thing for you. Essentially a bullet journal is a customized planner or sketchbook to help you capture notes, thoughts and inspirations (Cousins, 2017). Thus using a bullet journal can increase your creativity. And like sketchbooks it doesn't matter if you make a mistake on a certain page, though it may bother some people, bullet journaling is a place where you can accept errors and work to improve them in the future.


    3. Diary
    A diary is a record with discrete entries arranged by date reporting on what has happened over the course of a day or other period (Wiki, n.y).

    Bullet journaling is not only a fun and creative alternative for your regular planner but it can also be your diary. A bullet journal is all of the following: to-do list, planner and diary! You can keep track of your daily activities, schedule important appointments, jot down important memos all in one place without having to worry about organization within the system.

    I, personally, am a type of person to keep a lot of notebook for various purposes but ever since I started bullet journaling I've learned to only keep and appreciate one notebook without having the urge to buy a new one.There are days where I want to be creative and make a certain page really cute but most days I tend to just jot down important things first before going in and doodling on them. There are days where I want to keep a diary and my bullet journal is able to fill that void in.

    What's your favorite thing about bullet journaling?
    Continue Reading
    Hey guys!

    It has been a really long time since I've last posted on this blog. I know I posted a life update [blog] post just about a few days ago but today is business and with that said I am bringing you a review on a product that I've been wanting to get my hands on for so long- that is the Health & Beauty: AZTEC SECRET Indian Healing Clay.

    This clay mask is said to be the "world's most powerful facial", deep pore cleansing with 100% natural Calcium Bentonite Clay. I bought this at Healthy Options for PHP 525 (approximately $10) and this has 1 lb of Calcium Bentonite powder. As a student who still lives under the roof of my parents, PHP 525 is quite out of my price range but I have no regrets in buying this because it is said and I've got a feeling that this would last me for months or years even. One scoop of this powder is already enough to cover my whole face plus my neck. Before I get into further details about this product let me just brief you about my skin type first so that you guys could have an idea what we're dealing with here.

    My skin is more or less a normal skin type, the corners of my mouth and nostrils are dry and only my nose gets oily so I don't really know what to classify myself as but I'm going to go with normal skin type. Or maybe I'm a combination skin type, I don't really know but moving on.


    Health & Beauty: AZTEC HEALING CLAY 

    Indian Healing Clay

    "World's most powerful facial"


    Facials, acne, body wraps, clay baths, foot soaks, chilled clay for knee packs and insect bites! Enjoy the benefits of clay in your own home. Beautify and Refresh.

    DIRECTIONS:
    1. Mix clay with equal parts of raw apple cider vinegar and/or water. 

    So I actually tried both apple cider vinegar and water on this clay powder just to see the difference between the two on a separate day and on the first try I used water first. I'm not sure if I had put too much water on it or it wasn't supposed to react/bubble when used with water but because of the lack of reaction that I got from using water instead of apple cider vinegar before mixing it up to form a clay mask, the experience wasn't as extravagant compared with on day two when I used apple cider vinegar. Nevertheless, my skin still tightened up and I could literally feel my face pulsate after 5-10 minutes of use. 

    I would still recommend to use apple cider vinegar because it has its own healing properties as well.

    2. Use a non-metal bowl and utensil to stir the mixture well to a smooth paste. Add more clay powder or liquid as necessary.

    This is because metal utensils reduces the healing property of the clay mask and if you want a scientific explanation to this you can visit this site to find out more.

    3. Apply 1/8 in. to 1/4 in. to the face or other area. Let it dry for 5-10 minutes on delicate skin and 15-20 minutes for normal  skin.

    As I've said before after 5-10 minutes of use you'll feel your face literally pulsate and a feeling of pulling and tightening sensation on your skin.

    After 5-10 minutes or 15-20 minutes of use, gently remove the clay by washing them in warm water. Although it is said to give your skin a slight redness after removing the clay mask, I didn't really had that experience but if you do fret not because the redness will disappear in about 30 minutes.


    Before I used this product I had a pimple on my forehead and on my chin and after putting on the clay mask on the first try it dried them out and I was left with a slightly blackened, flat used-to-be pimple mark on my forehead and on my chin. I slept on it and on the next day its condition was still the same, in case you were wondering. My second try of this product, it completely eliminated any sign of the pimple mark on my face.

    Aside from the product's healing properties it also claimed to deeply cleanse my pores and coincidentally I have quite a problem with my nose since I am prone to blackheads and whiteheads so testing this product out on its ability to deeply cleanse my pores as it claims, it would be easy to see the results.

    Regarding its ability to deeply cleanse my pores, I don't think it did a good job on the first and second try in eliminating my problems in the nose area. There were still some blackheads and whiteheads left, although they weren't that bad I was still disappointed in the results that I got. Maybe I need to use it daily to actually see the end result but so far I am bummed about not being able to eliminate my problems on the first and second try of this product.

    Overall, I would still recommend this product if you want to try it out. It does have its healing properties in eliminating your pimples and pimple mark so I would definitely recommend this product for that. A photo documentation could've been nice to prove my points but due to excitement and generally I just forgot to document them, I wasn't able to provide evidence so I'll make sure to update this post some time in the future.


    SUMMARY:
    • Price: PHP 525 (approximately US$10)
    • Where to buy in the Philippines: Healthy Options
    • Use it once per week or more often for problematic skins 
    • 5-10 minutes of application for delicate skin
    • 15-20 minutes of application for normal skin
    • Wash with warm water 

    Continue Reading


    DISCLAIMER: Note that this blog post was supposed to go up on March 24, 2018 but for reasons I can not tell it was postponed up to this day.

    Hey guys!

    It has been awhile since I've last posted on this blog. I've let you guys hanging with my last post, How to Deal with Academic Pressure: 3 tips to Help You Cope with Stress. I posted that in hopes of being able to help fellow students out there because I was and still am dealing with academic stress myself and since I am a graduating student there's seem to be a lot of requirements requested for us to pass within a specific time period. 

    Over the course of time, I have been thinking a lot about creating a new blog and completely disregarding this existing one. I thought of re-branding this blog again but I've done that in the past now and I don't want to overdo it by re-branding this again. But you know what I also live by the saying "third time's the charm", and I am quite sure that this will be the last time I would re-brand my blog. So I would like to formally end my reign as Dani dot Yes! and would like to introduce to you my new blog name Halo-Halo!


    Halo-Halo

    A Filipino dessert made with mixed fruits, boiled sweetened white beans, milk, and flavored crushed ice, typically topped with purple yam, crème caramel, and ice cream (oxford dictionary).


    From the root word "Halo" which means "Mix" in Filipino or Tagalog, I wanted to re-introduce my blog as having or rather covering two or more blog categories but mostly lifestyle and beauty. I didn't want to stick to just one category because I know that I have a lot to say about everything and I also wanted to share my knowledge and thoughts with you guys, but there will be a theme this time and I want it to be the center of attraction of this blog. And that is no other than my beautiful home country, the Philippines.

    My vision is to inspire other people and appreciate the beauty and aesthetics of the Philippines. I was raised in another country and have been raised into their culture and mannerism that I think it's time to fully appreciate my own country's culture and beauty. This is my journey and lifestyle, Mabuhay Philippines!


    Continue Reading

    How to Deal with Academic Pressure: 3 tips to Help You Cope with Stress

    how to deal with stress


    I have skipped the last week of January in publishing my last post relating to HTML and CSS programming language because of my insufficient time to write it. Being bombarded with school work has been a struggle for many students especially to those who have extra curricular activities after school. With exam pressures and anxiety received daily, academic stress can become a struggle to students as early as middle school (Huffpost, 2013).

    Academic stress can get the best of you if you do not know how to deal with them. Time and scheduling, being organize plays a vital role in your overall performance. Below are my three tips to help you cope with stress.

    1. Manage Your Time

    Remember that there is only 24 hours in a day and it may seem like it's long but in reality once you get started with your school works or extra curricular activities, you'll notice that 24 hours is not enough to finish all your work especially if you're one of those students who likes to cram the day before their homework is due.

    Cramming essentially makes you stressed out because of the pressure of knowing that you'll need to pass whatever homework it is or that there is an exam the next day. The result of cramming varies from person to person but the overall bottom line of this is that it adds up to your stress or it is the cause of you stress. 

    To avoid cramming and make the most out of your day, you should learn how to manage your time. Below are just some of my tips in managing mine.

    • Plan ahead
    • Prioritize wisely
    • Be organized 
    Planning ahead serves as a guide to me so that I will not get overwhelmed with the things needed to be done in the next few hours or the next days and months. I have noticed that it improved my overall performance at school, it helped me get less stress over thinking about what's going to be my next post, and it helped me become more productive. 

    Planning ahead, of course, made me realize what to prioritize on my to-do list so I believe that prioritizing wisely is important as well. The truly urgent work will get more of the attention and ultimately get done faster (Hubpages, 2014). If you know that a certain homework is almost due then you have to prioritize that first before this other homework that has been given to you that is due the next week. 

    If you do the two things mentioned above then certainly you'll be organized. And to help you further in planning ahead, I suggest getting a planner or make a bullet journal to meet your needs.

    how to deal with stress

    how to deal with stress


    2. Be Prepared 

    Prepare the things you need for the next day the night before. This is a simple but helpful tip for students or even workers out there. Preparing your things the night before makes the next day go smoothly because you don't have to worry about forgetting anything. It saves time, you don't have to worry, you just have to go about your morning routine and once you're done you just have to grab that bag and off you go. 

    This doesn't only apply to your things but it applies to others as well like prepping your breakfast and making your lunch. The good thing about being prepared the night before is that you're going to get a good night sleep. 

    3. Study Timetable 

    This is similar and quite frankly related to managing your time but this is one of the best tip that you can take to improve your academic performance. A college friend of mine that has a GPA of 4.0 which is equivalent to 93-96 percent, studies 4-7 hours a day. That's a lot of dedication in studying compared to mine. I have a GPA of 3.7 and if you're still interested on how I maintain that grade then read on!

    You should have at least 1-3 hours of your time dedicated to studying on one or two subject. I personally think focusing and dedicating your time on a subject that you know you're not good at helps you improve on that particular subject. A little tip in understanding difficult concepts is to use simple analogies to make it memorable for you. 

    To have an effective study timetable make sure to include time for homework and revision of materials already covered as well. Revising already covered materials will help you master it and it will remain inside your head.

    how to deal with stress


    There are other small ways in which can help you destress a little that can be easily implemented into your daily routine as well.

    1. Sleep well
    2. Keep a joy journal (this one is inspired by pinterest)
    3. Meditate 
    4. Draw or paint
    5. Workout
    6. Play with your dog
    7. Read a book
    8. Take a nap 
    9. Relax
    10. Smile and Laugh often

    Share your thoughts and your own personal tips on how you deal with academic pressure or stress in general on the comment section below or share it with me on twitter at @danidotyes. Have a nice day!
    Continue Reading


    Hey guys!

    This is going to be quite a long and detailed post on some of my favorite go-to easy CSS designs that could be easily implemented on your page so buckle up.

    So on my previous post, HTML Made Easy, I had briefly discussed about the four essentials or rather necessary elements in HTML and on this post you will be able to actually see that it is indeed the building blocks of a webpage. We will be tackling a bit of CSS (Cascading Style Sheet) here and I will do my best to explain them in an easy to understand lingo so that you can follow.

    Courtesy of my go-to site whenever I forget or want to go back on a certain topic, I have gathered three CSS designs that are easy to manipulate and understand even for those bloggers that are inexperience when it comes to coding.

    I have provided pictures for you to see how and what it's going to look like so that you can be guided visually. 


    1. CSS Box Model

    CSS Box Model refers to a box that wraps around an HTML element as you can see on the picture below on the left side. 


    Because of my previous post, you may be more familiar with this arrangement:


    <!DOCTYPE html>
    <html>
    <head>

      <title> </title>

    <head>
    <body>

    </body>
    </html>


    But now that we're going to be manipulating an HTML element, we have added the <style> </style> element for us to put our CSS codes in. This element would go between the <head> </head>, so it is going to look something like this:


    <!DOCTYPE html>
    <html>
    <head>

      <title> </title>
      <style>


      </style>
    </head>
    <body>

    </body>
    </html>


    Now that we have that covered let's talk about what we are going to put in between those <style> </style> element for our CSS Box Model to work.


    div{
    background-color: #40a977;
    width: 300px;
    border: 7px;
    padding: 10px;
    margin: 25px;
    }


    • background-color → Whatever value you put in this property, may it be #40a977 (green), blue, red, etc., this is what the background color of your box is going to be.

    • width → This is the width of your box. The longer (500px and up) the width, the longer your box is going to be horizontally.

    • border → This goes around your box or rather the padding of your box. The thicker it is (10px and up) the more visible it is going to be.

    • padding → This is the space between your text and the border.

    • margin → This is the area around the CSS Box Model.

    • div → This is the selector. We will be using this on an HTML element that we want to style.

    Now that that is out of the way, let's move on to our final step which is incorporating that CSS code into our HTML. 

    Under the <body> </body> we will write <div> </div>, and in between those tags is where our text will go.

    And that's it, you have your CSS Box Model!


    2. CSS Outline

    CSS Outline is a line that is drawn around our <p> </p> or paragraph. There are ten types of this but here I'm only going to show you three of my personal favorites which are the dashed outline, groove outline, and outset outline.

    Here is the list of the remaining types of outline:
    • dotted
    • solid
    • double
    • ridge
    • inset
    • none
    • hidden


    This is fairly simple to make because the CSS code is just the same except for a few parts. Just add the following between your <style> </style> element:


    p.outline type{
    outline-style: outline type;
    }


    You just need to change the outline type to whatever outline type you wish for it to be.

    Now for our HTML it's as simple as the CSS one you just have to change a few parts as well. Between the <body> </body> tags add the following:


    <p class="outline type" align="center/right/left"> your text goes in between this tags </p>


    You can align your text on the center, right, or left.

    And that's it, you have an outline!


    3. CSS Font-Variant

    "The font-variant property specifies whether or not a text should be displayed in a small-caps font.

    In a small-caps font, all lowercase letters are converted to uppercase letters. However, the converted uppercase letters appears in a smaller font size than the original uppercase letters in the text." -w3school


    This last favorite CSS design of mine is the most easiest among the two above. For the CSS code add the following in between your <style> </style> element:


    p.small{
    font-variant: small-caps;
    }


    And as for our HTML, add the following under the <body> </body> element:


    <p class= "small"> your text goes in between this tags </p>


    And that's it for the font-variant!

    I hope you guys found this post useful and helpful for those who wants to add a little flavor to your blog post, comments are welcome below. See you on my next post!

    Continue Reading


    Hey guys!

    I've started my 2018 with a topic that I am quite knowledgeable on, Basic HTML Codes Every Blogger Should Know, with that I have decided to blog about programming for the rest of this month to spread knowledge to those who wants to learn HTML and CSS but in an easy way and easy to understand lingo.

    This week I am going to introduce to you what an HTML is, what it does, and its importance to your blog or website so without further ado, let's get into it.

    What is an HTML?

    HTML is shortened for Hypertext Markup Language. Just like how an atom is the building blocks of matter, HTML is the building blocks of a webpage. There are four elements that is essential to it and these are html, head, title, and body.


    HTML elements are represented by tags, tags such as the ones I have mentioned in my last post image, hyperlink, headings, etc. Some of the most used tags by programmers are paragraph <p>, line break <br>, h2 heading <h2>, and strong <strong> or bold <b>. 

    Take note as I say those are just some of the tags that we often use a lot especially in making websites. So there are a lot more of it and if you're interested to learn more about it stay tune for my next blog post!


    <!DOCTYPE html>

    This is a declaration that defines a document to be HTML5. (Source) 

    You may be wondering what's the difference between an HTML and HTML5, to make it easy to understand there's not much of a difference between the two. HTML5 is just the latest and greatest version of HTML and that's it.


    Elements Explained

    I have mentioned the four essential elements on an html and now I'm going to explain them briefly what is it about. 

    • html is the root of your page, it is the skin that covers your body.
    • head contains the meta information about the document, it is where your brain is at and with that said...
    • title is the title for the document (the one that you see on your tab alongside the favicon), it is your identity, who you are as a person, how you think, how you see things, I think therefore I am.
    • body contains the content, tags are used here. 


    HTML is the building blocks of a webpage but if you compared it to CSS (Cascading Style Sheet), which we are going to tackle later on this month, and JavaScript, it is nothing but a mere skeletal form of your website. 

    It is the core of your website and having a good foundation makes it easy to manipulate or rather implement designs which are coded by the use of CSS.


    That is it for today's blog, let me know if you found it useful!


    Continue Reading
    Newer
    Stories
    Older
    Stories

    About me

    Photo Profile
    Daniella Content Writer

    Daniella is a lifestyle and beauty blogger. A graduate of a reputable institution, De La Salle University, with honors for two consecutive years.


    Halo-Halo was created to spread knowledge, tips & tricks to fellow bloggers and spread joy of being a blogger.

    Read More


    Instagram @danidotyes

    Follow Me

    • twitter
    • bloglovin
    • instagram

    Followers

    Blog Archive

    • ▼  18 (10)
      • ▼  July (1)
        • 23 Bullet Journal Spread Ideas
      • ►  June (2)
        • The Ultimate Beginners Guide to Starting a Bullet ...
        • 3 Ways To Come Up With Blog Post Ideas
      • ►  May (2)
        • 3 Reasons Why You Should Start A Bullet Journal
        • Health & Beauty: AZTEC SECRET Indian Healing Clay ...
      • ►  April (1)
        • Life Update: March 24, 2018
      • ►  February (1)
        • How to Deal with Academic Pressure: 3 Tips to Help...
      • ►  January (3)
        • Designing Your Blog with HTML and CSS
        • HTML Made Easy
    • ►  17 (8)
      • ►  December (2)
      • ►  August (1)
      • ►  February (3)
      • ►  January (2)
    • ►  16 (10)
      • ►  December (5)
      • ►  November (5)

    Popular Posts

    • Health & Beauty: AZTEC SECRET Indian Healing Clay Review
      Hey guys! It has been a really long time since I've last posted on this blog. I know I posted a life update [blog] post just about ...
    • The Ultimate Beginners Guide to Starting a Bullet Journal
      Back in 2007 Ryder Carroll introduced the idea of bullet journaling to his colleague who was planning a wedding, and on August 2013 he ...

    Total Pageviews

    Twitter instagram pinterest bloglovin google plus

    Created with by BeautyTemplates

    Back to top